The Before picture...
Date 4/14/2007
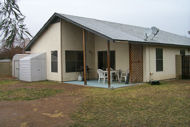 This is what the house looked like before construction started. This is what the house looked like before construction started.
I have a patio that is 10' x 15' that I am converting into a 16' x 15' game room. This will give me 240 sqft to put games in, in addition to the master bed room. The double windows on the patio lead into the master bed room and those will be turned into French Doors (without the doors initally) to give me a game room with a total space of about 420sqft. It will be a bit smaller then that due to the room shapes and the wall thicknesses.
|
Concrete has been removed...
Date 4/14/2007
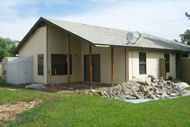 Here they have removed all the concrete from the patio. Here they have removed all the concrete from the patio.
Big pile of rubble!
|
Concrete gone, along with the rubble.
Date 4/14/2007
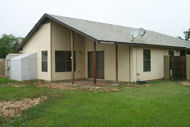 Here they have removed the concrete rubble. Here they have removed the concrete rubble.
Exciting! Well, ok, not too exciting, but cool none the less !
|
Setting up the Forms
Date 4/14/2007
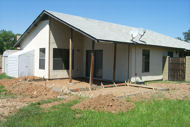 Here you can see they have dug up the area and put up the forms for the new slab and patio. Because of the City codes, I could not put the patio back out the back side of the house, but rather had to put it out to the side. Not a major deal, but I would have prefered the patio off the back. Here you can see they have dug up the area and put up the forms for the new slab and patio. Because of the City codes, I could not put the patio back out the back side of the house, but rather had to put it out to the side. Not a major deal, but I would have prefered the patio off the back. This should give you a good idea of the size of the new room and the size of the new patio. The new patio will be 14' x 8'.
|
ABC Material
Date 4/14/2007
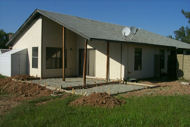 They put the ABC material down, getting ready to pour the Concrete. They put the ABC material down, getting ready to pour the Concrete.
Concrete should be poured tomorrow and if all goes well Framing will be done on Saturday.
|
Concrete Poured!
Date 4/14/2007
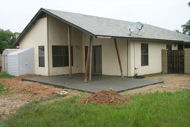 The concrete has been poured and tomorrow the Framing should be done! The concrete has been poured and tomorrow the Framing should be done!
It's cool to see it taking shape now!
|
Getting ready to do the framing...
Date 4/14/2007
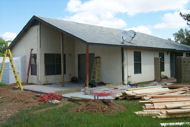 Here we are getting ready to start putting up the walls. Here we are getting ready to start putting up the walls.
Had to remove a lot of the Stucko from the corners of the house. Half the morning was spent at Home Depot getting the wood, loading the wood, then unloading the wood.
|
Two walls down... one to go
Date 4/14/2007
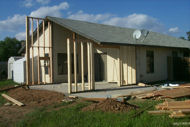 Two walls are done and ready to go. Two walls are done and ready to go.
The East wall and the ceiling is all that is left. After that it will need to be inspected.
|
Framing Close to being done!
Date 4/14/2007
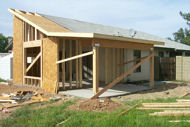 It's getting closer! It's getting closer!
Hopefully they will be finished tomorrow.
|
Almost, but not quite
Date 4/14/2007
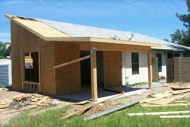 Getting there. Getting there.
They ran out of time yesterday so they didn't finish. They should finish up Wednesday and then I can call for an inspection. I didn't like how the Patio Posts and Beam turned out, so we are going to redo them. We didn't have the right wood at the time so I told them to use other wood, and it didn't turn out very well (doesn't look very nice). So I'll eat the cost of redoing that part, shouldn't be much.
|
The Ceiling is now in place!
Date 4/14/2007
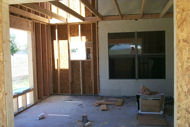 The ceiling has been framed as well. The ceiling has been framed as well.
This shot is from standing just outside where the new sliding glass doors will go.
|
Framing is done!
Date 4/14/2007
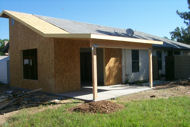 The framing is done, and now I'm waiting for it to be inspected. The framing is done, and now I'm waiting for it to be inspected.
The new posts and beam look way better, so I'm happy with that. After we pass the inspection, it's on to the other fun stuff. Stucco, Dry Wall, Electrical, etc... Glad there is no plumbing :-)
|
Waiting for Revisions to be Approved..
Date 4/14/2007
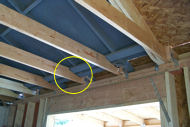 Well, the framing failed inspection. A couple of minor issues and one big issue. The Architect is working with the city to come up with a Fix that we will both be happy with. The issue they have is the way the 2x6's was cut down to fit under the edge of the roof. You can see in the picture where it is cut down (click on pictures for larger versions). Well, the framing failed inspection. A couple of minor issues and one big issue. The Architect is working with the city to come up with a Fix that we will both be happy with. The issue they have is the way the 2x6's was cut down to fit under the edge of the roof. You can see in the picture where it is cut down (click on pictures for larger versions). This shouldn't normally be an issue, but they want to make sure the building will last (as do I), it's just a little frustrating as this has delayed the construction by a week.
|
In the mean time...
Date 4/14/2007
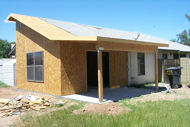 In the mean time, they've installed the Window and created the entry ways into the living room and master bed room. In the mean time, they've installed the Window and created the entry ways into the living room and master bed room.
The Sliding Glass doors will be done tomorrow.
|
Sliding Glass Door and Chicken Wire Installed
Date 4/14/2007
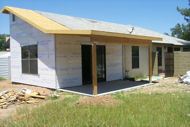 The door was put in yesterday (5/8/2007) and the chicken wire was put up today. Still waiting on the City to approve the minor revisions and then I can have everything inspected. Once that is done they can do the Stucco and the interior. The door was put in yesterday (5/8/2007) and the chicken wire was put up today. Still waiting on the City to approve the minor revisions and then I can have everything inspected. Once that is done they can do the Stucco and the interior. Electrical should be done soon as well. I'll probably be a bit over budget, but still in the area that I can live with. The concrete is what was a lot more expensive then I had originally planed on. Everything else so far is close to being what I had expected.
|
Almost done!
Date 4/14/2007
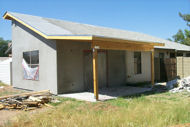 Ok, it's been awhile since I posted an update. The main reason for that was, I was fighting the CIty of Glendale over the Framing. That alone added 4 weeks to the build time. What a PITA that was. Ok, it's been awhile since I posted an update. The main reason for that was, I was fighting the CIty of Glendale over the Framing. That alone added 4 weeks to the build time. What a PITA that was. Then I failed the Drywall because I only put up 1/2" on the ceiling rather then 5/8". To solve that issue, we added another 1/2" to the top of it so now it's 1" thick. That was easier then pulling the 1/2" down and then putting 5/8" up over it and it would have cost the same in materials. So the only inspection left is the final inspection. As you can see in the picture, the Stucco is done! The only things left are:
Tape and Texture Painting Carpeting Final Electrical After that, move the games in and be done!
|
Painting is done!
Date 4/14/2007
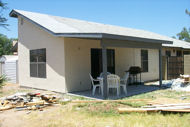 The painting is complete and it looks like it was part of the house when it was originally built. The room addition is almost done! Final Electric, and Carpeting are all that is left. The painting is complete and it looks like it was part of the house when it was originally built. The room addition is almost done! Final Electric, and Carpeting are all that is left. Won't be able to do the Carpeting until the concrete guys come back and patch the holes in the concrete. The holes are from where the original posts of the old patio used to be. They poured the concrete around the posts so that we didn't have to tear down the existing patio roof.
|
Robotron Blue
Date 4/14/2007
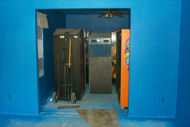 The inside of the two rooms where painted Robotron Blue. The inside of the two rooms where painted Robotron Blue.
I took my Robotron Overlay down to the paint store and had them color match the paint. I think it turned out pretty good. Once the carpet and the games are in there, I think it will look really good. Right now it's a lot of blue with not much to offset it yet.
|
Concrete Patched and Electrical is DONE!
Date 4/14/2007
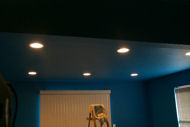 The Concrete was patched yesterday, and the Electrical was done today. The Concrete was patched yesterday, and the Electrical was done today. Now all I'm waiting for is the carpet! I think I'm going to just leave the can lights normal bulbs and just pick up some Floresecent Black Lights and put them on the walls. The Can lights look too cool the way they are. The Floresecents are a lot easier to get then the incandescent lights anyway. I'm hoping to have the Carpet done on Friday. That will give me time clean up and arrange all the games over the weekend. I ordered a bunch of classic Marquees to hang on the walls, hopefully those will arive this week as well.
|
Special Thanks!
Date 4/14/2007
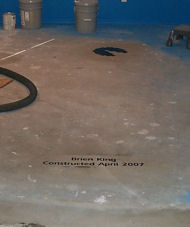 I would like to give special thanks to Brian Jones at Oleszak Creative for helping me out with my little Easter Egg. I would like to give special thanks to Brian Jones at Oleszak Creative for helping me out with my little Easter Egg.
Brian does some of the best Arcade Reproduction Artwork in the business. He created a couple of stenciles for me that I used to spray paint the concrete floor with.
|
Easter Egg!
Date 4/14/2007
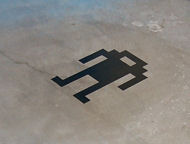 Some day when I sell the house and someone remodels the room they are going to go "WTF??". Some day when I sell the house and someone remodels the room they are going to go "WTF??". It was just one of those wierd Ideas that I thought would be cool, so I did it :-)
|
Construction is Complete!!
Date 4/14/2007
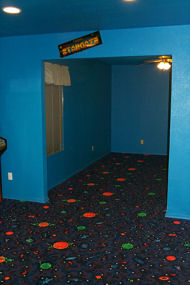 Carpeting was put in Sunday and now I'm moving all the games in and decorating. I have signs and stickers that I got from Oleszak Creative and need to go somewhere. Carpeting was put in Sunday and now I'm moving all the games in and decorating. I have signs and stickers that I got from Oleszak Creative and need to go somewhere. I have several Marquees on the way that I need to hang. I found a cool way to hang them too. I bought a bunch of 1/8" Clear Plastic Mirror Clips that are used to hang bathroom mirrors. I painted them black and I use two per marquee. The Stargate Marquee is hung with them.
|
Games are moving in...
Date 4/14/2007
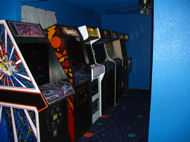 As you can see, I've started moving games in. As you can see, I've started moving games in.
Without the games in there, it looks like you have a ton of space, but it goes away very quickly :-)
|
Lights Out!
Date 4/14/2007
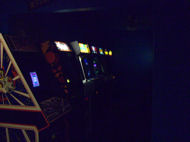 Here you can see it with the lights off. No black light yet, but probably by the end of the week. I decided to go with the Floresecent type black lights rather then putting them in the cans as the florescent is easier to get and doesn't put out as much heat. Here you can see it with the lights off. No black light yet, but probably by the end of the week. I decided to go with the Floresecent type black lights rather then putting them in the cans as the florescent is easier to get and doesn't put out as much heat. Yes, I know, I need to fix the marquee light on Tempest :-) Few games need coin door lights as well.
|
It's official!
Date 4/14/2007
The room passed the City's Final Inspection today, so it is officially done. Once I have all the decorations up, I'll have more pictures to post. I picked up some black lights and they make the carpet look awesome! I'll try to get some good pictures of that, not sure how well they will turn out, but I'll give it a shot! I've had family here visiting this week and they like the new room. Donkey Kong and Donkey Kong Jr. seem to be the favorites, followed closely by Pac Man and Ms. Pac Man :-) Talk about finishing in the nick of time :-)
|