Date 3/29/2000
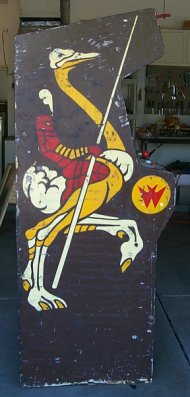 On the 25th, I spent an hour and a half finishing the left side of my Joust. The heat gun does work wonders but as you look at the picture you will see that its not perfect. It does work A LOT better than Strippers and is a lot more cost effective. In fact, if I wanted to strip a game completely, I think I would use a heat gun now. It works really well with Latex paint, and even works with the other types of paint too (That's one of the draw backs ). On the 25th, I spent an hour and a half finishing the left side of my Joust. The heat gun does work wonders but as you look at the picture you will see that its not perfect. It does work A LOT better than Strippers and is a lot more cost effective. In fact, if I wanted to strip a game completely, I think I would use a heat gun now. It works really well with Latex paint, and even works with the other types of paint too (That's one of the draw backs ). If you look closely you will see the areas where I heated it up too much and it melted the original paint as well. You should also be able to see the scrap patterns below the bird. One of the problems that I found is that the paint from the scraper would some times stick to another part of the side and cause it to look bad. You really can't heat it up again and scrap it off since you don't have that much protecting the original Art. Another issue that I ran into was that I had to stop quite a bit and clean off the putty knife that I was using to scrape off the paint with. The putty knife should be as clean as possible in order to prevent you from leaving paint behind or not scraping paint off at all. The most successful technique that I found was to run the heat gun back and fourth over the area I intended to scrape in order to warm it up. I then moved back to the starting point and started heating it to the point that the paint would bubble up. I then scrapped in a single motion with the heat gun slightly ahead of the putty knife, causing the paint to bubble up in front of it.
|
Date 3/29/2000
 The trick is find the best speed in which to scrape the paint off. The trick is find the best speed in which to scrape the paint off.
Too slow and you wind up taking too much of the original art off. Too fast and you start missing strips of paint. If you can, do the outside edges first as it gives you a little room to play with when starting to strip.
|
Date 3/29/2000
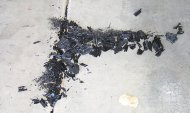
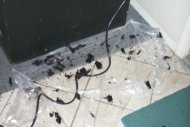
Once you are done, you are left with a pile of paint shavings.
|
Date 3/29/2000
I can not stress enough how important it is to do this in a well Ventilated area! This stuff really stinks and is probably not healthy for you anyway. I highly recommend using a mask when doing this. I used a painters mask and it worked wonders for me. The art may not be perfect, but now you can at least make stencils or mask it off and repaint it. One other thing that you might want to consider is that you should lay the game on its side, or like me, lay it across two saw horses. This will save your back and it will make it easier to strip the paint off.
|
Date 3/29/2000
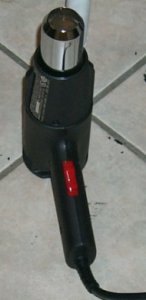 I remembered reading on USENET about someone (Sorry, I don't remember who, if I could remember who, I would give them credit here) using a heat gun to strip paint off a cabinet, so I decided that I should give it a shot. Well, to make a long story short, it works awesome! What you see so far of the art is about 15 mins worth of work. I remembered reading on USENET about someone (Sorry, I don't remember who, if I could remember who, I would give them credit here) using a heat gun to strip paint off a cabinet, so I decided that I should give it a shot. Well, to make a long story short, it works awesome! What you see so far of the art is about 15 mins worth of work. I had a heat gun that I normally use for my Hockey sticks that I decided to try on my Cabinet. I first tried it on LOW and it was starting to make the paint bubble. I started scrapping a putty knife and started scraping the black paint off. It was going pretty slow so I decided to turn it on High. High works A LOT better, you just have to use caution so you don't heat it up too much.
|
Date 3/29/2000
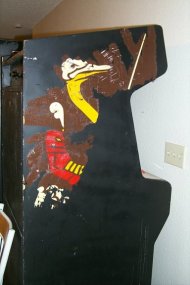 So I started heating up the paint, watching it bubble up and scraping in small stripes until I saw something I recognized. It was the bird! I then started looking for the rider. As you can see in the picture, the side art is still in tact. So I started heating up the paint, watching it bubble up and scraping in small stripes until I saw something I recognized. It was the bird! I then started looking for the rider. As you can see in the picture, the side art is still in tact. If you look near the birds head you can see where I heated it up too much and started scraping the original paint off (Oops!). If that's all the damage I do, then I'll be happy. This technique has worked a lot better for me and I plan on finishing this up this weekend. One word of advice! Do this in a WELL ventilated area as it STINKS! The fumes are probably not good to breath either.
|
Date 3/29/2000
 You should also be prepared for a mess, not nearly as bad as using stripper, but still it will be messy. You should also be prepared for a mess, not nearly as bad as using stripper, but still it will be messy.
|
Date 3/29/2000
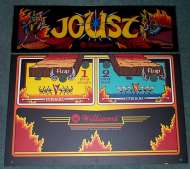 Here is my new Marquee and Control Panel Overlay! Here is my new Marquee and Control Panel Overlay!
They are awesome!
|
Date 3/29/2000
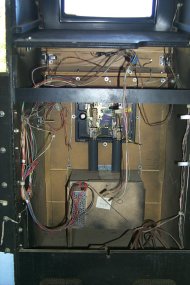
 The first thing to do, is to document where everything is currently. The first thing to do, is to document where everything is currently.
This will also allow us to do a "Before" and "After" look of the restoration.
|
|
|
|
|
|
|
|
|
Date 3/29/2000
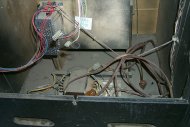
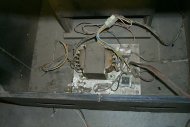
 Its a Rats nest of wires in there! Its a Rats nest of wires in there!
Most conversions are this way. What ever is the quickest way to put in a new game. Lucky for me, they didn't do too much damage.
|
Date 3/29/2000
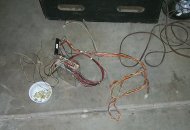
 A better shot of the Isolation Transfomer in the cabinet. A better shot of the Isolation Transfomer in the cabinet.
Man is this thing filthy!
|
Date 3/29/2000
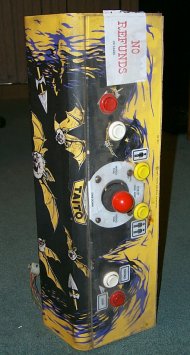
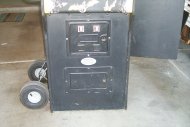 The front is in pretty good shape. The front is in pretty good shape.
Dirty, yes.
|
Date 3/29/2000
 Hmmm.. what game was this converted to again? Hmmm.. what game was this converted to again?
|
Date 3/29/2000
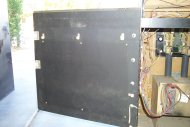 The back door is in real good shape and still has the plastic clips for the wires. The back door is in real good shape and still has the plastic clips for the wires.
|
Date 3/29/2000
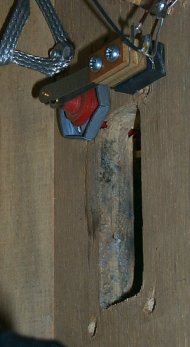
 Yank out the old switcher, it will be replaced with a new switcher. Yank out the old switcher, it will be replaced with a new switcher.
This one probably works, but I have a cooler switcher to put in.
|
Date 3/29/2000
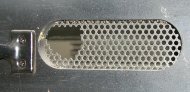 Someone put a hole in the grill. Someone put a hole in the grill.
Now I need to figure out where to get a replacement grill for it. If you know of one, please drop me an @EMAIL@.
|
Date 3/29/2000
 Yep! Yep!
This was a joust. You can still see the holes for the Joysticks. It was nice of them to only drill a couple new holes and in fairly easy places to repair. It could have been A LOT worse. Just look at the Robotron #1 restoration to see what I mean.
|
Date 3/29/2000
 As you can see, the Joust Joystick goes here. As you can see, the Joust Joystick goes here.
The extra buttons was drilled pretty damn close to the joystick slot, but not bad enough to make me give up on it.
|
Date 3/29/2000
 Removed from the game and ready to strip down. Removed from the game and ready to strip down.
|
Date 3/29/2000
 Completly stripped of everything. You can see what is left of the Rastan CPO. Brute force as usual to remove it. All the controls and the plexi that covered the top of the control panel. Completly stripped of everything. You can see what is left of the Rastan CPO. Brute force as usual to remove it. All the controls and the plexi that covered the top of the control panel. Bondo will be used to patch this control panel since it has a metal plate. I'll let you know how that goes.
|
Date 3/29/2000
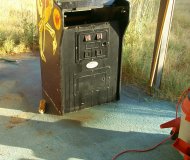 Its spring cleaning time! Its spring cleaning time!
Yes, its filthy. I see messages on rgvac all the time asking "How do I clean my game". Well, for starters, you remove EVERYTHING from the game. Then you take it out back, and hose it down with a garden hose!
|