In the begining!
Date 6/5/2011
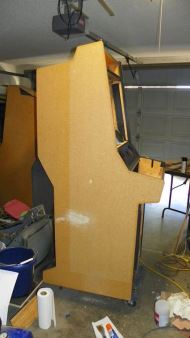
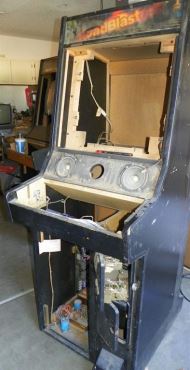 I picked up two System 1 cabs from my friend John Butler. They were both originally pretty beat up Road Blasters, however, I'm a bigger fan of PPR rather then Road Blasters, so that's what it's being restored as. In fact, of all the System 1 games, I would say Road Blasters is my least favorite. As you can see, it's pretty dirty and the sides have lots of scratches and dings. The first step in any restoration is to document what you have and what needs to be done. After that, you then proceed to strip the entire cabinet down to it's bare essentials. Make sure to document where the parts came from. It's also a good idea to take lots and lots of pictures as you go. If you think you've taken enough pictures, you haven't. Take them from as many angles as you can. Digitial Cameras make life easier because you're not limited to the number of pictures you can take. Atari System 1 cabinets are covered with a black vinyl that you can stripped off using a razor blade. The trick is getting it started. The best place is usually in a gouge or tear that already exists. After removing all the vinyl, you can move on to the inside of the cabinet.
|
Things that need to be fixed
Date 6/5/2011
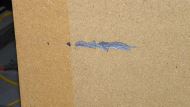
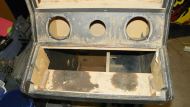 The first major area that will be worked on is the Control Panel area. As you can see from the picture, someone spilled something on the control panel (probably Soda). Another reason not to let food or drinks into the game room :)
|
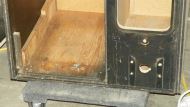
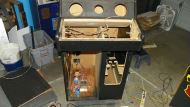
Inside Cabinet
Date 6/5/2011
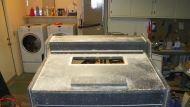
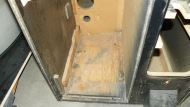  The inside of the cabinet needs a bit of cleaning out. This is typical with pretty much every game I get. The type of wood used, will dictate which method I use to clean it out. In the case of the Atari cabinets, they are made from MDF, so care must be taken not to get them too wet. For this job, it's usually the Wet & Dry vac first to clean out the majority of the dirt and other garbage. After that, I use a damp towel to wipe the rest down. After that, I use Pledge. If you use Pledge, I suggest you use a respirator as the fumes will get to you in the confines of the cabinet.
|
Side Damage
Date 6/5/2011
 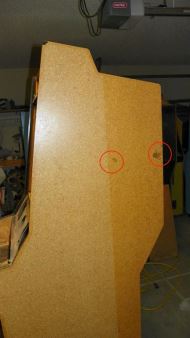  The sides have a few dings in them. The left having a nice gouge in it.
I was worried about this, but it turns out the bigger gouges are easier to fix then the smaller ones. For gouges and dings of this size, I use Elmers Wood Filler. It's easy to work with, you don't have to mix anything, it doesn't have an odor, and it drys pretty quick. For major patchwork I normally use Bondo.
|
Top and Back
Date 6/5/2011
  The top and back could use a fresh coat of paint. I'll be using rattle can paint on these as they are small areas and I am out of normal black paint. I don't really want to pick up a quart of paint for two very small areas.
|
Powder Coat Parts
Date 6/5/2011
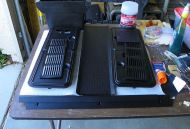 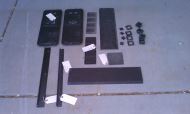 Since I have two Atari System 1 cabs that need restoration, I am going to get the metal parts for both cabs done at the same time to save on the cost.
|
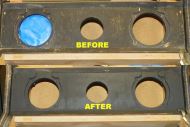
Sanding down the inside shelf
Date 6/5/2011
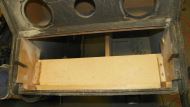 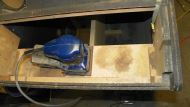 The shelf on the inside of the control panel area had a soda stain on it. Since the cabinet was made from MDF, it wasn't going to wash out. The best solution for this was to sand it down with 60 grit sand paper. As you can see in the second picture, this worked very well and went pretty quick.
|
Speaker Area
Date 6/5/2011
  The speaker area needed a fresh coat of paint, so I masked it off, and hit it with a rattle can. I wasn't looking for perfection here as it would be hidden behind the speakers and speaker grill.
 What I wanted was a touchup and to darken it up a bit to make sure it wasn't visible through the speaker grill. I could have filled, primered, painted, but for this area, I didn't think it warranted the extra effort.
|
Gas Pedal Area
Date 6/5/2011
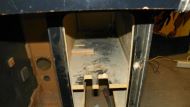
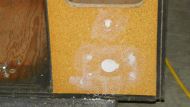  Since I was planning on making this a dedicated Peter Pack Rat and not converting it back to a Road Blasters, I decided I didn't want the Gas Pedal attached and I didn't want the holes showing up. So I pulled the Gas Pedal out, and used Bondo to fill the holes.
|
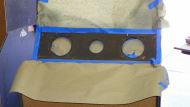
Applying the Vinyl
Date 6/5/2011
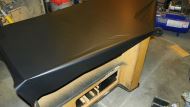 This is the first cabinet I ever did with Vinyl. Special thanks to my friend Joe who helped me with this. If you've ever seen Joe's restorations, you'll know why I asked him to help on this. All of his restorations look MINT. We applied the vinyl with the cabinet laying down. Joe normally applies it with the cabinet standing up, however, I wanted to try it with the cabinet lying down to see if that made it easier for one person to do or not. After this restoration, I think I'll be applying it when it's standing up as well. It worked fine for the sides, but the coin door area was challening because we were fighting gravity. The vinyl wanted to sink into the coor door opening, which made it difficult to get it just right. We wasted a few sheets of vinyl getting it just right. To apply the vinyl, you start at one end, and remove the backing from the vinyl. You want the vinly to hang over the edges so that you can trim it down to size. Then with a soft rag or squeege (we used a %100 cotten t-shirt), you press the vinly on to the cabinet in the opposite direction of where you started. While you are doing that, you slowly peel the backing off the vinly. Do this slowly and methodically. There is no rush to get it done. 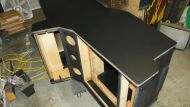 Once you have the vinyl applied and smoothed out, you'll want to use a razor blade and trim along the edge of the cabinet. Again, take your time and make sure you have a nice even cut. Use the edge of the cabinet as a guide to make sure your razor blade is flat. A couple of things to keep in mind about vinyl. - It shows EVERY little imperfection, so your surface prep must be perfect. Any dust, ding, or other contaminate on the surface will stick out like a sore thumb. I learned this the hard way.
- Vinly stretches very easily, so don't pull on it. Some times you can lift the vinyl and move it's placement, but you have to do it very carefully. Nine times out of ten, you'll be replacing the vinyl if you screw up the placement of it.
|
Side Art Placement
Date 6/5/2011
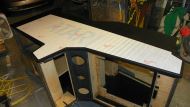 After the vinyl has been applied, it's time to put on the side art. The method used here is the "Dry" method. Next one will be the "Wet" method. Lay the side art on the side of the cabinet (don't remove the mask or the backing) and determine where it should go. Since the cabinet had an outline of where the original art was placed from the factory, it was easy to determine where it went. In this case it's a 1/2" offset from the edge of the cabinet. 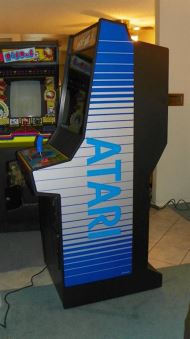 Once you have the art where it should go, use some blue painters tape to hold it in place. Make sure the art is squared up on the cabinet so that the distance is equal on all sides. The control panel area might be slightly further then 1/2", but should be close. Once you have everything in place, peel the backing off starting at the top. Then carefully stick the side art to the cabinet and smooth it down with a 100% cotten t-shirt. Then slowly peel the backing off and smoothing the side art out as you go down the cabinet. Take it slow, if it sticks in the wrong spot, chances are, the art is going to stay there. If you try to pull it back up, you'll probably ruin the art. Once the art has been applied, you can then pull the top mask off. I would leave the mask on as long as possible to protect the art.
|
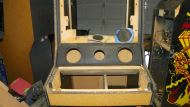
Putting it back together
Date 6/5/2011
Well, hopefully you remembered how everything goes back together :)
 We'll start by installing the wiring, power supply, a new 120V fan, new power cord, the power switch, and the the plastic cover for the power switch. We'll start by installing the wiring, power supply, a new 120V fan, new power cord, the power switch, and the the plastic cover for the power switch.
Then we'll move on to the speakers, and speaker grill. After the speakers comes the coin door and finally we install the PCB's and control panel. The last thing I installed was a brand new Vision Pro monitor. Since everything else was redone, and the other monitor has Road Blasters burn in, and this machine is a Keeper, I decided to use a brand new monitor.
|
The final touches
Date 6/5/2011
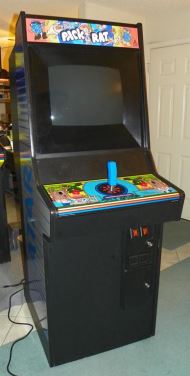 After installing everything else, we can add new T-molding and the Marquee. Special thanks go out to my friend JawHn, who made me a reproduction of the Marquee.
|