| Most of the games that I pick up are missing the grounding plug or they are pretty beat up and/or hacked. Not having the ground plug is a shock hazard, and being hacked or beat up could be a fire hazard. |
 |
| If you've ever replaced a power cord before, you may have gone through all the trouble of desoldering the cord from the line filter and attaching a new cord. I know I've done it that way in the past and have even written that up on my site. Well, luckily, laziness kicked in and I thought of an easier way to do it. |
 |
|
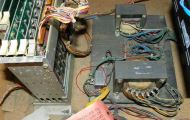
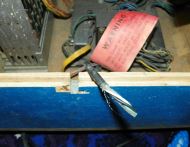
I leave the original power cord attached to the line filter and I chop off the power cord about 6 inches away. This only works if your line filter is good and the power cord isn't damaged for the first 6 inches. This has a couple of benefits.
- You don't have to desolder anything, which can be a major pain with the old solder and where it's located.
- You can easily disconnect the power cord or replace it in the future if something happens to it.
- It's faster to replace this way since you're not desoldering anything.
|
 |
|
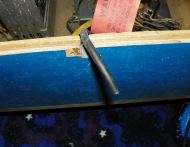
After I chop the cord off, I then peel back the insulation so I can get to the three wires. I usually cut back about 3 inches.
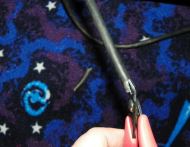
I start at the end and carefully slide one edge of the cutters in to the end, avoiding the wires and snip.
|
 |
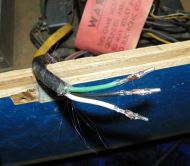
| I then repeat until I'm about 3 inches in, then I cut off the excess insulation so it looks like this. You can clean up the extra insulation (looks like hair in the picture). |
 |
| The next step is to strip the wires and crimp .093 Molex Pins on each wire. |
 |
|
I use the 3 conductor Molex housings that are keyed so they only go together one way. I always use the Socket side for the inside of the cabinet and the Plug for the outside.
I always use the center for Ground when it comes to AC, that way if you somehow were to reverse the two outside wires you would be fine since it's AC current.
This makes it easier to pull apart later without putting any additional stress on the one inside of the game.
|
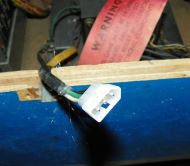 |
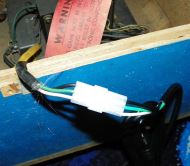
| After that, I put the plug into the socket before inserting the wire. I start with the ground in the center, then match the wire colors on the outsides. |
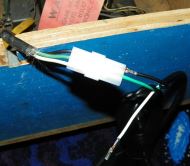 |
When you're done, it should look like this. In the particular case, the power cord I used was a 6 foot power cord that I picked up from Bob Roberts. I'll be buying the longer ones in the future since the one I took off the game is 12 feet.
This is another reason to replace the power cord this way. If you do want to upgrade the power cord to a longer one, you can.
|
 |
|
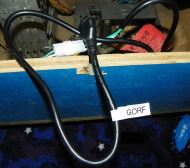
I also tag all my power cords with the game they are from. This makes it a lot easier to unplug the right game from the power strip when you can't actually see where the power cord goes.
All in all, this should take you about 10 - 15 minutes to replace the power cord. The desoldering method would probably take close to double that amount of time.
|
 |